Learn about a structured approach to counting your company's physical assets
Inventory counts help you keep track of your inventory. During an inventory count, each article in your store is counted and recorded to spot all lost articles in your inventory.
On this page
When to complete an inventory count
How to complete an inventory count
When to complete an inventory count
Usually, inventory counts are completed periodically at least once a year. Many businesses perform their annual physical inventory count before compiling their annual financial reports.
Depending on your business and industry it may be convenient to conduct an inventory count at the end of your season when most of your articles have been returned to your store.
How to complete an inventory count
Inventory counts are most efficient when your articles are labelled with barcodes and with the help of a barcode scanner.
The following guide will walk you through how to efficiently perform an inventory count with the help of a barcode scanner and a spreadsheet application of your choice - we use Microsoft Excel in the example below.
Here's how to do it:
- Navigate to your Inventory and open the Articles tab.
- Export your list of articles by clicking Export on the top right corner

- Open the exported CSV file in Excel, or your preferred spreadsheet application.Here is how to transform a CSV file, to split the information in columns and edit the data.
- Add a new column to the spreadsheet into which all articles you can find in your store or arehouse will be entered.
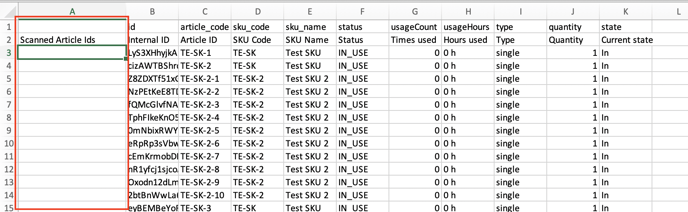
- Start your inventory count by scanning all of the article ID's you find to the newly created column. You can of course also manually type in your article IDs in the column, if you do not work with barcode scanners. The scanned or entered articles may not appear in the same order as the Article ID column. This is fine and does not affect the following steps.
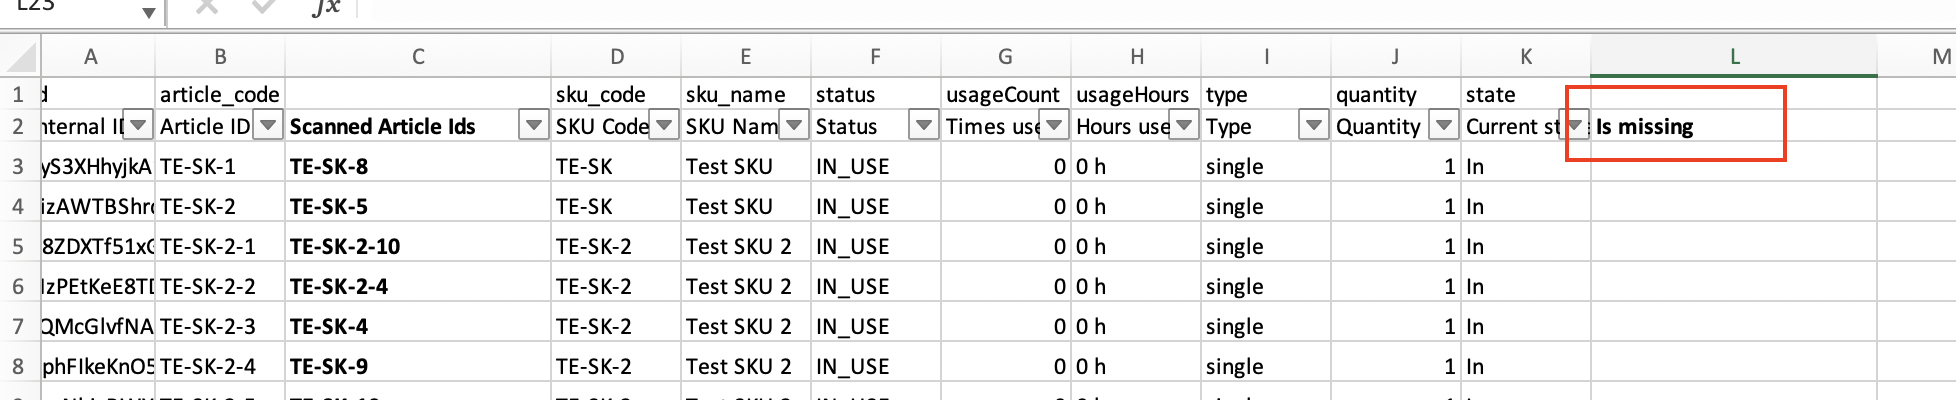
- Add another new column into which you will record for each article whether it has been found or not.
 To do so, you'll need to compare the Scanned article IDs column with the Article Id column to find all of the articles that have not been found. With Excel this can be done with the help of the VLOOKUP function:External help on VLOOKUP function The following example will return the value TRUE in each cell of column L if the article of your Twice inventory (column B) could not be found in the Scanned article IDs column C.
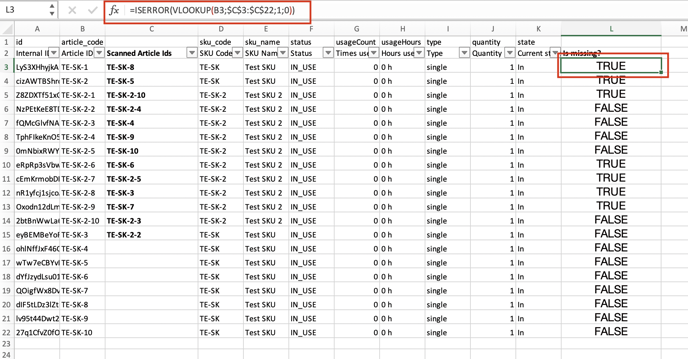
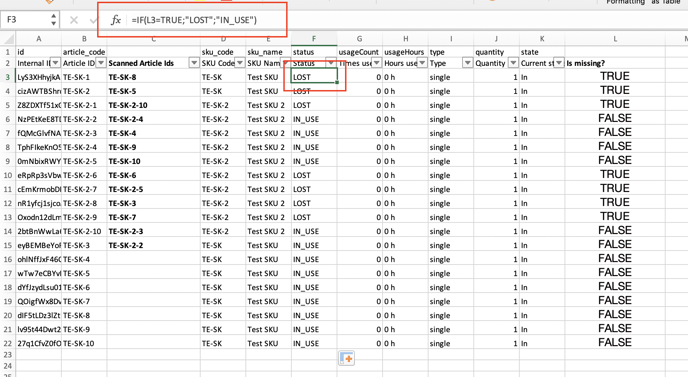
- You can now filter the list based on the is missing value TRUE to have a list of all articles that are missing after your inventory count.Now you can update the Status column value to LOST or IN_USE based on the Is missing? column value with an IF function as shown in the example below.
- We recommend saving the file now to your computer/cloud.
You now want to upload this information back to your Twice Admin App:
- You can delete the two columns we have created (e.g. Scanned Article Ids, and Is missing) if you don't want to include this data to your inventory.
- Save the file as a .CSV file
- Navigate back to the Inventory page in your Twice Admin App
- Click on Import then click on Choose file and choose the CSV file you just created.
- The import will update the Status column value. Read more about adding and editing articles with the inventory import.
- Click on Confirm import
- You can now still delete any extra columns that were imported if you like. That's it, the status for all of your lost items has been updated.