How to customize the appearance of your Twice online store by using themes
This article will guide you on how to edit the appearance of you Twice online store for your customers. You will be able to edit the layout of your homepage, add a banner image, use a favicon, resize your logo, add custom content to the footer and freely modify the content of your about section.
On this page
- Where to find the customizer
- Start creating your own theme
- Save, reset and publish your new theme
- Managing themes for multiple locations
Where to find the customizer
In your Twice Admin App navigate to Settings > Online Store
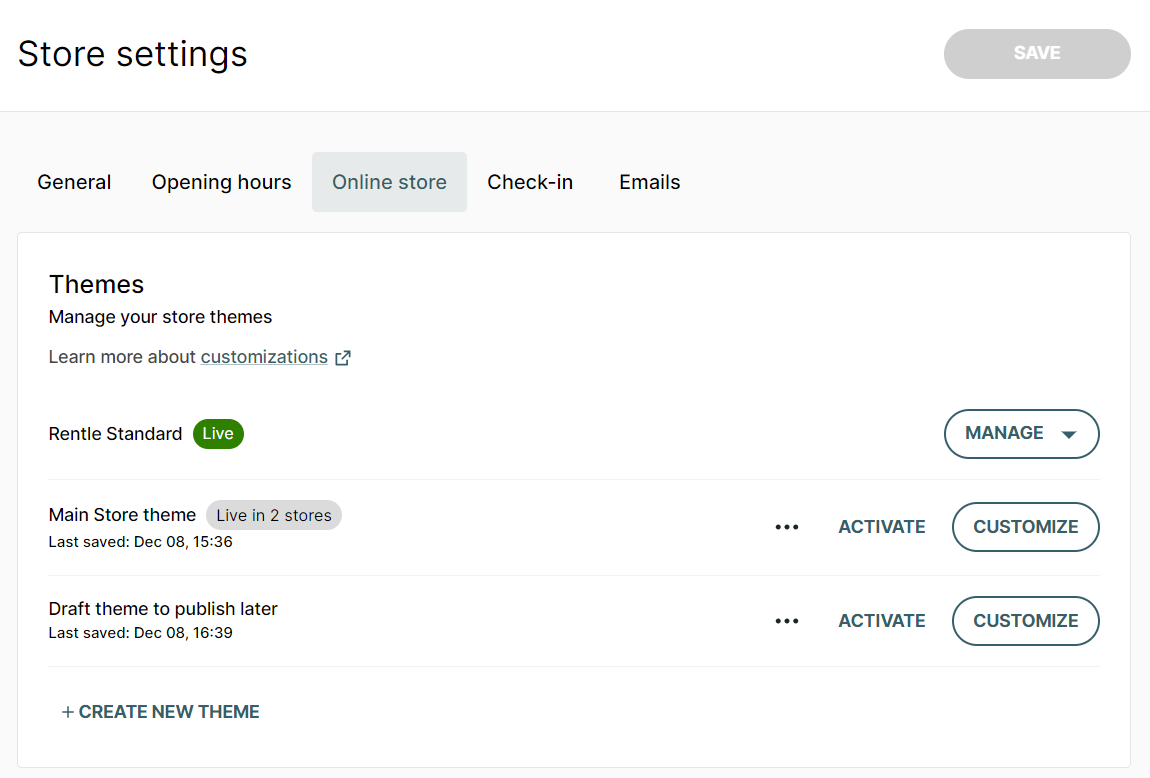
Here you can manage, activate and customize your store themes. When viewing the Themes section for the first time, you will only have the Twice Standard theme available, as this is the layout all new Twice accounts are created with.
After creating at least one additional theme, a little green Live will indicate, which theme is currently visible in your Twice online store. Choose another theme simply by clicking activate in the section of the respective theme. Via the three dots you can rename your themes. This way you can prepare different themes in advance e.g. depending on seasonality and come back to your themes whenever you are ready to activate them.
Start creating your own theme
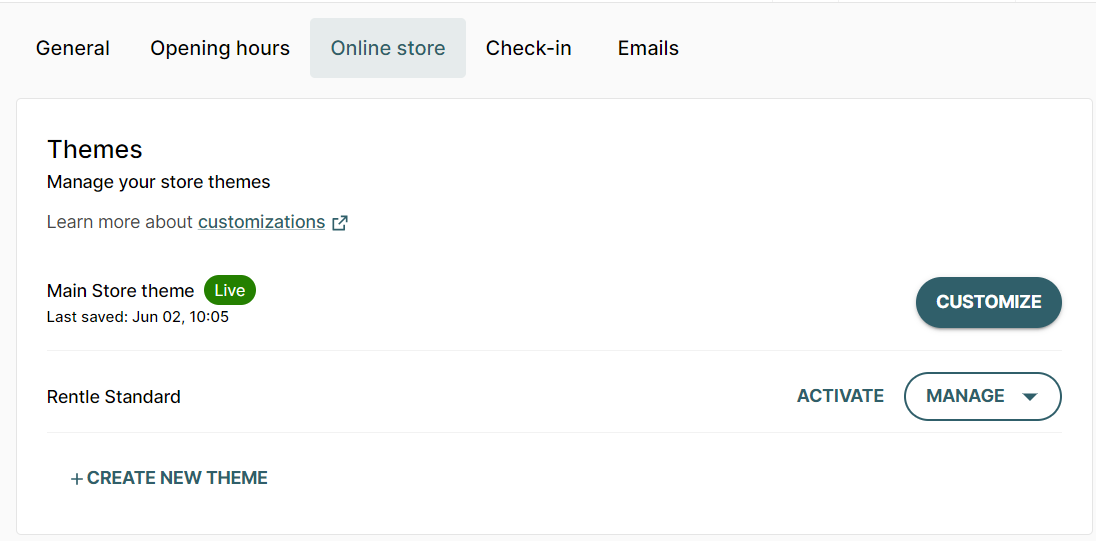
Select which theme you want to edit and click on Manage or Customize or click +Create new theme to start customizing from scratch.
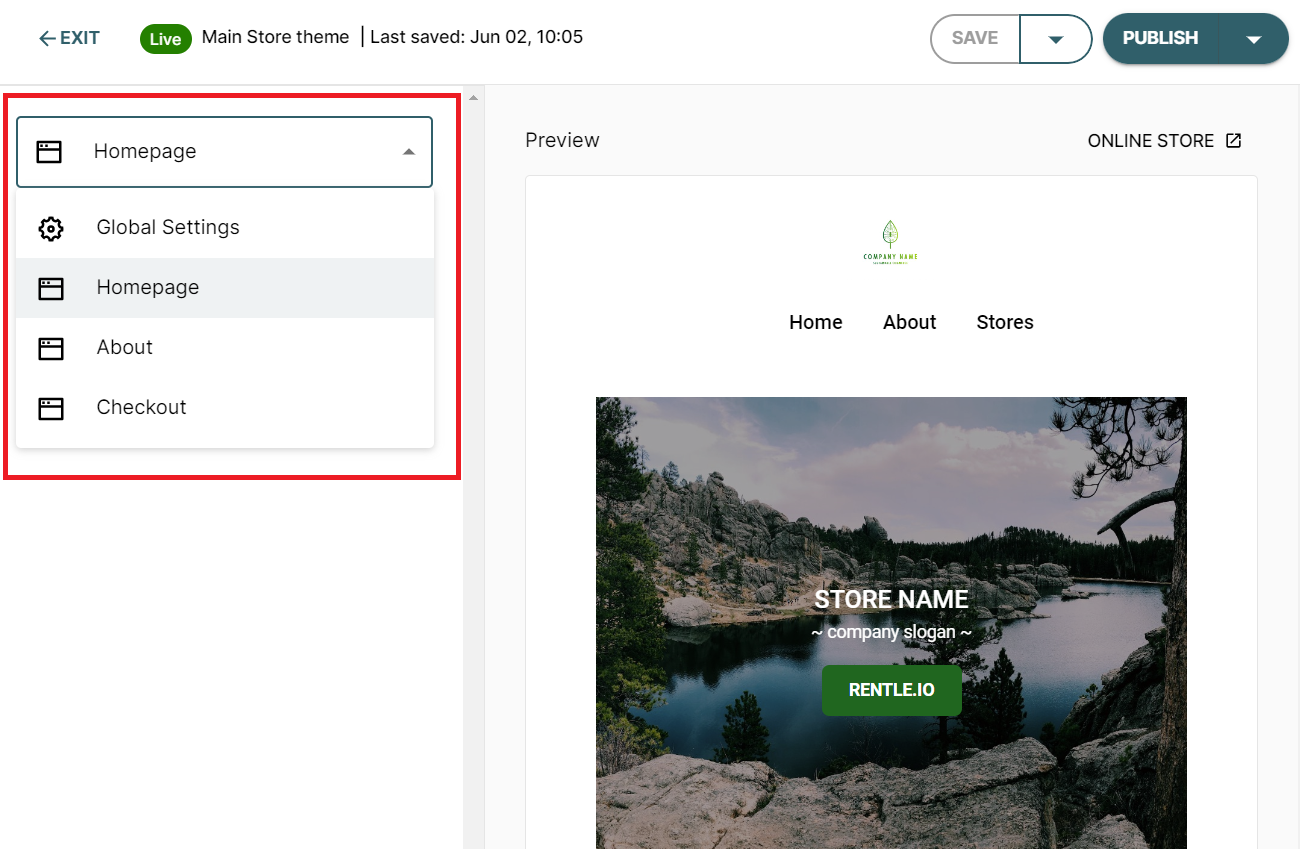
The customizer will open and on the top left you can choose to edit your
- Global Settings: Customize general theme settings, header and footer of your Twice online store
- Homepage: Customize the layout and featured image of your homepage
- About: Add sections according to your liking and business requirements
- Checkout: Add multiple checkboxes and forms to your checkout process
You can see how your changes will look like in the preview on the right side of the screen.
Save, reset and publish your new theme
When customizing your themes, you can decide whether you want to publish the changes immediately or not.
In the top of your customizer you can choose to Save the theme you are currently working on. Saving a theme will not publish any changes to your Twice online store and you can come back to the customizer later to make further adjustments or set it live whenever you are ready. Via the little dropdown menu you can choose to Save the theme under the current Name, Save as new theme or Reset to the current live version.
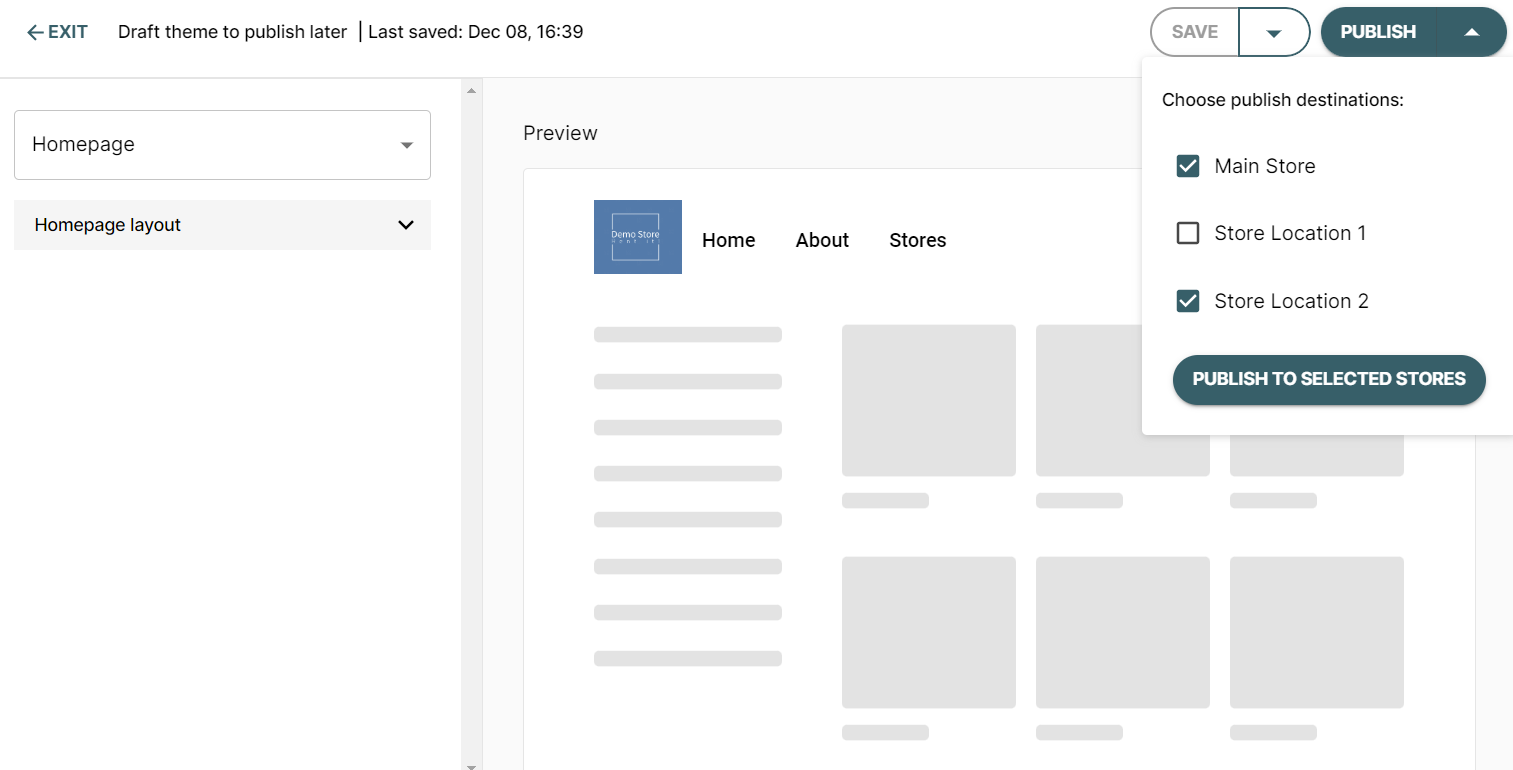
Via the Publish button on the top right you can decide to which additional store locations you want to publish the current theme.
Managing themes for multiple store locations
When operating multiple Twice store locations the customizer allows you to manage their online appearances centralized.
You can create one theme to be displayed in all of your locations, or define multiple themes and choose freely which layout you want to display for which location.
The example below shows a Twice Shop operating three different Store locations. The Twice Standard Theme is live in the currently selected store location. The main store theme is set live in the other 2 store locations, while the draft theme to publish later is not set live in any location.